
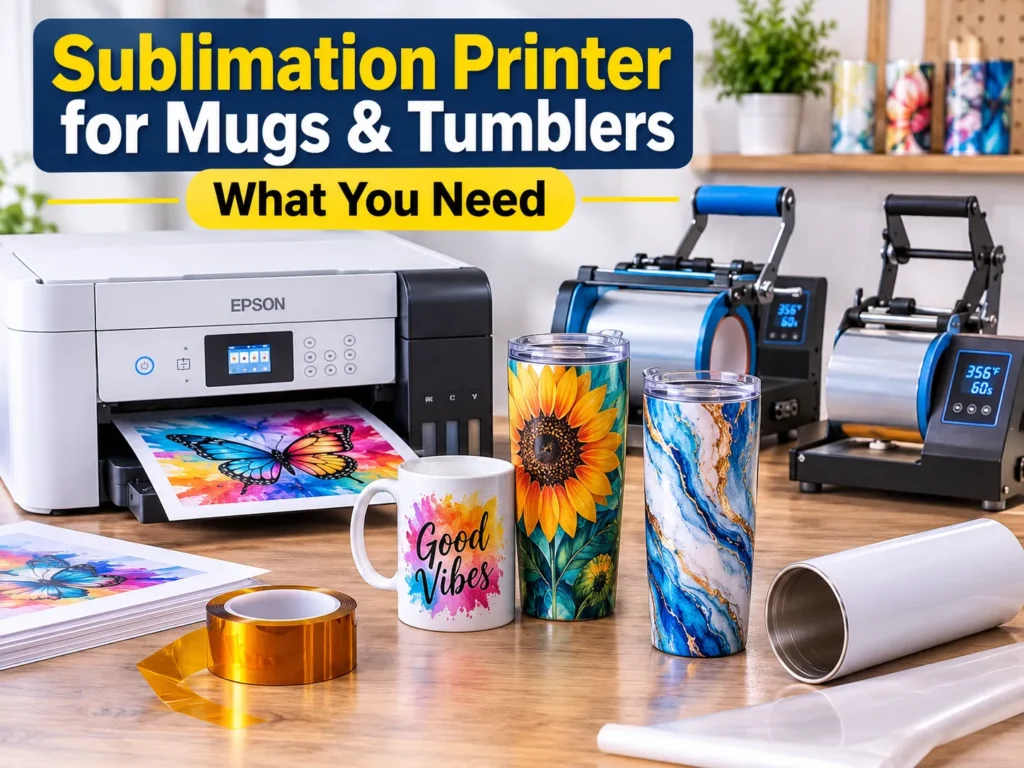
Buying a sublimation printer for tumblers is only half the decision. You also need a compatible drinkware blank and the right pressing equipment. A printer creates the transfer, while a mug press, tumbler press or suitable convection oven applies the heat. Choose these components together to avoid wasted blanks, undersized wraps and incompatible equipment.
Affiliate disclosure: GadgetsChamp participates in the Amazon Associates program. As an Amazon Associate, we earn from qualifying purchases. This does not affect our recommendations.
What Equipment Do You Need?
| Equipment | Recommended application |
|---|---|
| Epson SureColor F170 | Dedicated sublimation printing for compatible drinkware designs |
| Converted Epson EcoTank | Budget-oriented setup using compatible sublimation ink |
| Cricut Mug Press | Compatible ceramic sublimation mugs |
| Tumbler heat press | Compatible cylindrical tumbler blanks |
| Craft-only convection oven | Compatible blanks using an approved oven method |
The important distinction: Your printer does not press the design onto the drinkware. You need separate equipment to transfer the image through heat.
For general printer comparisons, see our best sublimation printers compared by use case. This guide concentrates on drinkware compatibility rather than repeating that roundup.
What Printer Do You Need for Sublimation Mugs and Tumblers?
Why Regular Inkjet Printers Do Not Work
A regular inkjet printer uses standard dye or pigment ink. A sublimation printer uses specialized sublimation ink that changes into gas when heated.
That gas bonds with the polymer coating on compatible drinkware. The result becomes part of the coated surface rather than sitting like ordinary printed ink.
You need three compatible components:
- A printer filled with sublimation ink.
- Sublimation transfer paper designed for that ink.
- A mug or tumbler with a compatible polymer coating.
An ordinary ceramic mug or uncoated stainless steel tumbler will not produce the intended sublimation result.
Dedicated Sublimation Printer vs. Converted EcoTank
Both approaches can produce drinkware transfers, but they involve different setup requirements.
| Factor | Dedicated printer | Converted EcoTank |
|---|---|---|
| Initial setup | Ready for sublimation | Requires conversion |
| Ink | Manufacturer sublimation ink | Compatible third-party sublimation ink |
| Setup complexity | Lower | Higher |
| Ink compatibility | Manufacturer specified | Depends on conversion and ink |
| Warranty | Manufacturer terms apply | Conversion may affect coverage |
| Best for | Straightforward setup | Budget-conscious makers |
The Epson SureColor F170 is a dedicated option. It arrives with genuine Epson dye-sublimation ink and supports rigid products such as mugs.
A converted EcoTank can reduce initial equipment costs, but you must confirm the exact printer model and ink compatibility. Do not mix ordinary ink with sublimation ink.
For a wider model comparison, explore our best sublimation printers compared by use case. Our separate guide to Epson SureColor F170 specifications and ownership costs covers that printer in greater detail.
Which Sublimation Printer Can Handle Your Mug and Tumbler Designs?
The printer’s maximum media width determines how large your transfer paper can be. It does not automatically determine whether every tumbler wrap will fit.
Epson SureColor F170 Print Size and Limitations
Dedicated desktop sublimation printer
- Maximum paper width: 8.5 inches
- Maximum sheet size: 8.5 × 47.2 inches
- Paper tray: 150 sheets
- Maximum resolution: 1200 × 600 dpi
- Ink: Four-color Epson T49M dye-sublimation ink
The 8.5-inch figure describes the maximum paper width, not the entire printable area. Epson specifies 3 mm side margins, leaving approximately 8.26 inches of nominal printable width.
This matters when you prepare a full-wrap design. A transfer that barely fits the paper may still exceed the printable area.
Can the F170 Print a 20 oz Tumbler Wrap?
Yes, it can handle some 20 oz skinny tumbler designs, depending on the blank and template.
Consider an illustrative wrap measuring approximately 9.3 × 8.2 inches. These dimensions are not universal and must match your actual tumbler.
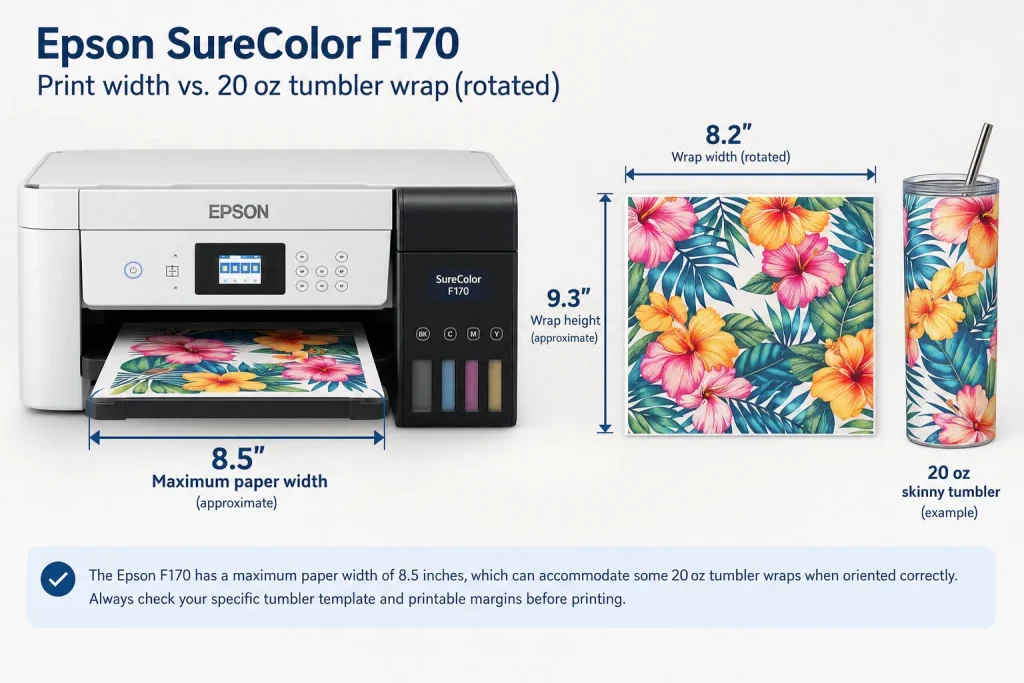
The 8.2-inch side can run across the printer’s 8.5-inch media width. The 9.3-inch side runs along the paper feed direction.
However, the nominal printable width is only about 8.26 inches. That leaves very little room for positioning or additional bleed.
Before printing:
- Measure the actual straight or tapered blank.
- Download its manufacturer-specific wrap template.
- Rotate the design to fit the paper orientation.
- Check printable margins and bleed requirements.
- Print a test on ordinary paper before using sublimation paper.
Do not assume every 20 oz tumbler fits. Tapered blanks, wider templates and full-bleed artwork can require different equipment.
When Do You Need a Wide-Format Sublimation Printer?
Consider a wider printer when your designs regularly exceed the F170’s media width.
A larger format can help with oversized transfers, wider products and production workflows involving multiple print sizes.
However, buying a wide-format printer just for ordinary mugs or compatible skinny tumblers may waste money. Match the printer to your actual blank dimensions and expected order volume.
Mug Press vs. Tumbler Press: Which Machine Do You Need?
Your printer creates the transfer. The pressing equipment applies the heat and pressure required to bond the design with the coating.
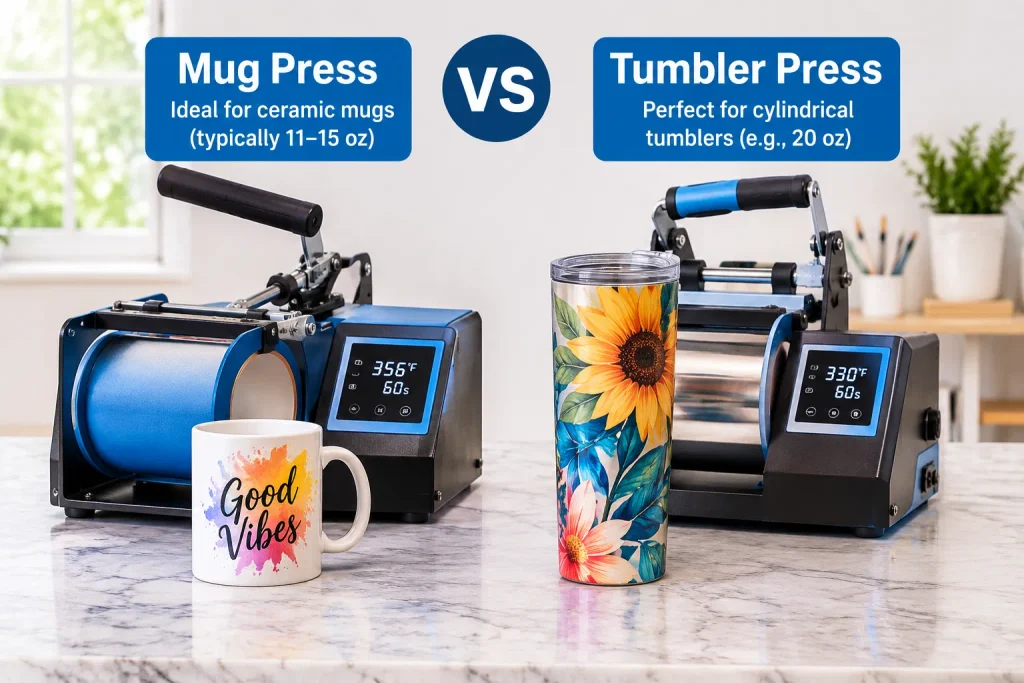
Choosing the wrong press can ruin an otherwise correctly printed transfer.
Cricut Mug Press: What It Can and Cannot Press
It’s designed for compatible ceramic mugs, with automatic heating and no manual temperature or time adjustment.
According to Cricut’s Mug Press compatibility guidance, compatible non-Cricut blanks should meet these requirements:
- Capacity: 10–16 oz.
- Diameter: 3.2–3.4 inches.
- Maximum height: 4.72 inches.
- Smooth, straight pressing surface.
Cricut lists an average pressing time of approximately six minutes. Actual time varies with mug and room temperature.
Its biggest limitation is format compatibility. It is not a universal press for typical 20 oz skinny tumblers.
Dedicated Tumbler Heat Press for 20 oz and 30 oz Blanks
A dedicated tumbler heat press suits compatible cylindrical drinkware. Before buying, check these specifications:
- Heating element diameter: Must match your tumbler’s circumference.
- Element length: Must cover the required printable height.
- Pressure adjustment: Helps maintain suitable contact.
- Shape compatibility: Straight and tapered tumblers may require different elements.
- Heating configuration: Single or dual elements affect coverage and workflow.
- Full-wrap support: Confirm whether the element covers the complete design or requires repositioning.
A 20 oz press does not automatically support every 20 oz blank. Compare actual dimensions, not just advertised capacity.
Mug Press vs. Tumbler Press Comparison
| Feature | Cricut Mug Press | Dedicated tumbler press |
|---|---|---|
| Main application | Compatible mugs | Compatible tumblers |
| Heating | Automatic | Model-dependent |
| Manual adjustments | Limited | Usually adjustable |
| 20 oz skinny tumbler | Not intended | Depends on element |
| Format flexibility | Restricted | Generally greater |
| Best for | Mug makers | Tumbler makers |
If you mainly produce ceramic mugs, choose a compatible mug press. If you sell 20 oz or 30 oz tumblers, prioritize a press with matching heating elements.
Can You Sublimate Tumblers in a Convection Oven?
Yes. You can use a suitable craft-only convection oven with compatible blanks and an approved shrink-wrap method.
How the Shrink-Wrap Oven Method Works
The general process involves:
- Print and mirror your design.
- Clean the compatible tumbler blank.
- Position the transfer around the blank.
- Secure the paper with heat-resistant tape.
- Apply the correct shrink sleeve or silicone wrap.
- Follow the blank and equipment manufacturer’s heating instructions.
- Remove the transfer using appropriate heat protection and allow safe cooling.
The sleeve holds the transfer against the tumbler during heating.
Tumbler Press vs. Convection Oven
| Factor | Tumbler press | Convection oven |
|---|---|---|
| Heating | Direct contact | Surrounding heated air |
| Setup | Dedicated press | Craft-only oven |
| Transfer method | Secured transfer | Transfer plus sleeve or approved wrap |
| Best application | Compatible repeat production | Compatible oven-rated blanks |
| Main consideration | Element compatibility | Heating consistency and handling |
One supplier, for example, specifies 365°F for 7–8 minutes for its particular 30 oz polymer tumbler. Another blank has different instructions. These settings are product-specific, not universal.
Safety: Never use a sublimation craft oven for food preparation. Follow the oven and blank manufacturer’s safety instructions, maintain ventilation and use appropriate heat protection.
What Supplies Do You Need for Sublimation Mugs and Tumblers?
The printer and press are only part of your setup. The consumables and drinkware blanks determine whether the transfer works correctly.
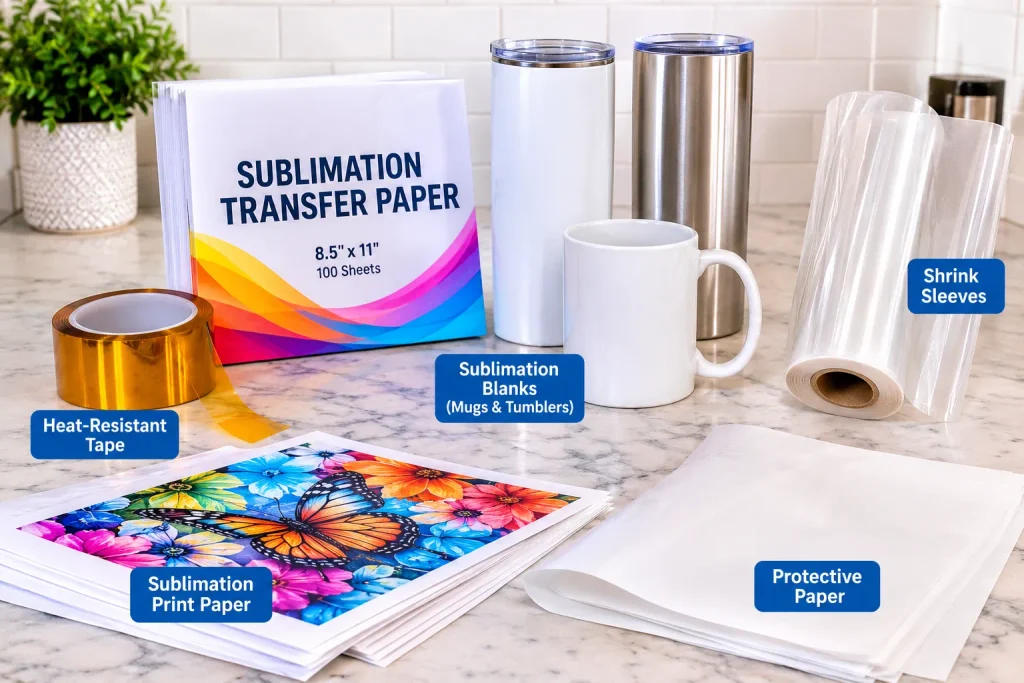
Sublimation Mugs and Polymer-Coated Tumblers
Choose blanks specifically manufactured for sublimation.
- Ceramic mugs: Need a suitable sublimation coating on the printable exterior.
- Stainless steel tumblers: Need a compatible polymer-coated exterior.
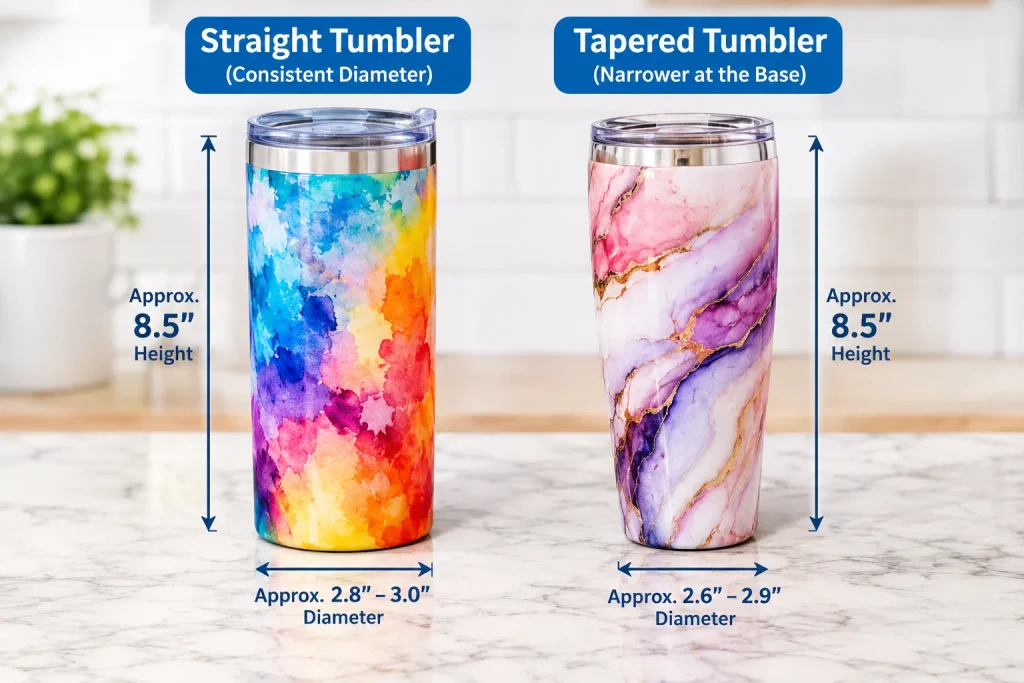
- Straight tumblers: Usually have a consistent printable circumference.
- Tapered tumblers: Need a template that follows their changing circumference.
- White blanks: Provide a suitable light background for full-color designs.
Ordinary stainless steel and uncoated ceramic do not provide the required sublimation surface.
For more information about compatible materials, read our guide to different sublimation blank types.
Sublimation Paper and Heat-Resistant Tape
Use transfer paper designed for your ink system and printing method.
Check these details before purchasing:
- Paper dimensions and printer compatibility.
- Correct printable side.
- Ink and paper compatibility.
- Mirrored artwork before printing.
- Heat-resistant tape that holds the transfer securely.
Loose paper can move during pressing and create ghosting or blurred edges.
Shrink Wrap, Protective Paper and Heat Gloves
These accessories support different parts of the process:
- Shrink sleeves: Hold transfers against tumblers during oven processing.
- Protective paper: Helps protect equipment from excess ink.
- Heat gloves: Protect your hands when handling hot blanks.
- Lint rollers: Remove dust and fibers before pressing.
- Heat-resistant tape: Keeps the transfer in position.
You can find the complete sublimation equipment list for a broader purchasing checklist.
How to Sublimate a Mug or Tumbler Without Common Printing Failures
A successful transfer starts with accurate measurements and continues through careful preparation, positioning and pressing.
Step 1: Measure the Blank and Prepare the Wrap
Measure the actual printable area instead of relying on a generic template.
For tapered tumblers, measure the top and bottom circumferences separately. Account for the blank’s printable height and the required bleed.
Step 2: Print and Mirror the Design
Prepare the artwork at the correct dimensions and resolution.
Before printing:
- Mirror the design.
- Select the correct paper and ink settings.
- Check the printer’s nozzle condition.
- Confirm paper orientation.
- Print a test before using an expensive blank.
Step 3: Secure the Transfer and Press
Clean the blank with a lint-free cloth or suitable lint roller.
Wrap the transfer tightly and secure it with heat-resistant tape. Follow the manufacturer’s temperature, time and pressure instructions for your specific blank.
Step 4: Remove the Transfer and Inspect the Result
Use heat protection when handling the finished blank. Remove the transfer according to the equipment instructions and allow the drinkware to cool safely.
Inspect the surface for gaps, blurred edges, uneven color and unwanted marks.
Common Sublimation Printing Problems and What to Check
| Problem | Possible causes to investigate |
|---|---|
| White gaps | Incorrect wrap dimensions or positioning |
| Blurry edges | Transfer movement or poor contact |
| Faded areas | Uneven heating, coating or ink issues |
| Ghosting | Transfer movement during pressing or removal |
| Speckles | Dust, lint or surface debris |
| Brown or burnt appearance | Excessive heat or pressing time |
Do not assume every defect has one cause. For example, faded areas can result from several different problems.
Practical example: Avoiding a wasted 20 oz tumbler
Imagine a maker has an F170, sublimation paper and a compatible 20 oz skinny tumbler. The maker downloads a generic wrap template and prints it without checking the blank.
The artwork extends beyond the usable printable width. The transfer then leaves an incomplete edge.
The better approach is to measure the actual tumbler, rotate the artwork when appropriate and check the printable margins before using the coated blank.
This is a worked compatibility example, not a reported customer case study or a hands-on GadgetsChamp test.
For a broader purchasing checklist, use our sublimation equipment checklist.
Which Drinkware Sublimation Setup Should You Buy?
Your ideal sublimation tumbler printer setup depends on what you intend to produce.
Best Setup for Beginners Making Ceramic Mugs
Consider the Epson SureColor F170 with a compatible mug press. This combination provides a dedicated printer and a straightforward mug-printing workflow.
The Cricut Mug Press suits compatible mugs within its specified dimensions. Its limited adjustments make it less flexible than many manual presses.
Best Setup for 20 oz Tumbler Sellers
Prioritize these components:
- A dedicated sublimation printer or correctly converted printer.
- Transfer paper that fits your artwork.
- A tumbler press compatible with the blank’s dimensions.
- Polymer-coated 20 oz tumblers.
- Heat-resistant tape and other necessary accessories.
The F170 can handle some rotated 20 oz wraps, but verify the actual template and printable margins first.
Best Setup for Small Businesses Producing Multiple Drinkware Sizes
Choose equipment around your production requirements.
A flexible tumbler press with compatible heating elements can accommodate more formats than a mug-only machine. A wider printer may also become useful when your designs exceed desktop media limits.
If you also produce apparel, our sublimation printer guide for T-shirts explains the different printing requirements.
Build Your Drinkware Sublimation Setup
Before buying a printer, check the complete equipment list. You need compatible blanks, transfer paper, a suitable press and the right accessories.
Start with our complete sublimation equipment list, then compare individual equipment listings.
Recommended purchasing priorities:
- Compare compatible tumbler presses.
- Check mug press dimensions.
- Choose polymer-coated drinkware blanks.
- Match sublimation paper to your printer.
- Add heat-resistant tape and suitable protective accessories.
Frequently Asked Questions
What Do You Need to Make Sublimation Tumblers?
You need a sublimation printer, compatible sublimation ink, transfer paper, polymer-coated tumblers and suitable pressing equipment. You will also need heat-resistant tape and, for oven processing, compatible shrink sleeves or silicone wraps.
The exact setup depends on the tumbler shape and manufacturer’s instructions.
What Machine Do I Need to Print on Tumblers?
You need two separate machines or equipment stages. A sublimation printer creates the transfer, while a compatible tumbler heat press or craft-only convection oven applies the heat.
Check the blank’s dimensions before purchasing a press.
What Kind of Printer Can I Use for Sublimation on Mugs?
Use a dedicated dye-sublimation printer or a compatible converted inkjet printer. The Epson SureColor F170 is one dedicated option.
A converted EcoTank can work with suitable sublimation ink, but conversion and warranty considerations matter.
Can You Do Sublimation on Any Tumbler?
No. A tumbler needs a compatible sublimation coating on its printable surface. Ordinary stainless steel does not automatically support sublimation transfers.
Check the manufacturer’s material and coating specifications before purchasing blanks.
Can You Use Cricut Mug Press for 20 oz Tumblers?
The Cricut Mug Press is not designed as a universal 20 oz tumbler press. Cricut specifies compatible mug dimensions, including a 3.2–3.4-inch diameter and maximum height of 4.72 inches.
Choose a dedicated tumbler press for compatible 20 oz skinny tumblers.
What Size Printer Do I Need for 20 oz Skinny Tumblers?
An 8.5-inch desktop printer can handle some 20 oz tumbler wraps when you orient the design correctly. However, printable margins and actual blank dimensions determine whether the artwork fits.
Measure the tumbler and check its specific template before printing.
Can You Sublimate Tumblers Without a Heat Press?
Yes. You can use a suitable craft-only convection oven with compatible blanks, heat-resistant tape and an approved shrink sleeve or silicone wrap.
Follow the specific blank and equipment instructions. Never assume that every tumbler supports oven processing.
What Temperature and Time Are Best for Sublimation Mugs?
There is no universal temperature and time for every mug or tumbler. The correct settings depend on the coating, blank material, transfer paper, ink and heating equipment.
Follow the manufacturer’s instructions for your exact blank and press combination.
Author Bio
Kamran Asghar writes about printers, printing equipment and practical buying decisions at GadgetsChamp. His work focuses on manufacturer specifications, product compatibility and helping readers choose equipment that fits their actual printing requirements.